Integrating Google Ads into your website can significantly enhance your marketing efforts by driving targeted traffic and increasing your revenue potential. This comprehensive guide walks you through the steps to successfully set up Google Ads on your site, whether you're a small business owner or a digital marketer looking to boost your advertising efforts.
Why Use Google Ads?
Google Ads provides one of the most effective ways to reach potential customers online. With precise targeting options, you can display your ads to users based on their search intent, demographics, and interests. This targeted approach helps maximize your return on investment (ROI) while putting your products or services in front of the right audience.
1. Create Your Google Ads Account
The first step to adding Google Ads to your website is to create an account:
- Visit the Google Ads website: Go to ads.google.com and click on 'Start now.'
- Set up your account: Follow the prompts to provide the necessary information for your new account.
- Choose your advertising goals: Indicate what you want to achieve with your campaigns, such as driving website traffic or generating leads.
2. Generate Your Ad Code
After setting up your account, you'll need to generate the ad code that you'll place on your website:
- Create your first ad campaign: Follow the guided steps in your account dashboard to create a new campaign.
- Select ad format: Choose the type of ad you want to create, such as text ads or image ads.
- Get your ad code: Once your ad is set up, Google will provide you with a unique ad code—this is what you'll embed on your site.
3. Add Google Ads Code to Your Website
Now that you have your ad code, it's time to add it to your website:
- Access your website’s backend: Depending on your website platform (like WordPress, Wix, or Shopify), log in to your admin panel.
- Insert the code: Depending on where you want your ad to appear, paste the ad code into the desired HTML section (such as the header, footer, or specific page content).
- Use a plugin if necessary: If you're using WordPress, consider a plugin like 'Ad Inserter' to manage your ads more effectively.
4. Test Your Ads
After adding the ad code, testing is essential to ensure everything is working properly:
- Preview your website: Check to see if your ads are displaying correctly on the site.
- Verify tracking: Make sure you have Google Analytics set up to track ad performance and user interactions on your site.
5. Monitor and Optimize Your Ad Campaigns
The final step is monitoring and optimizing your ads for better performance:
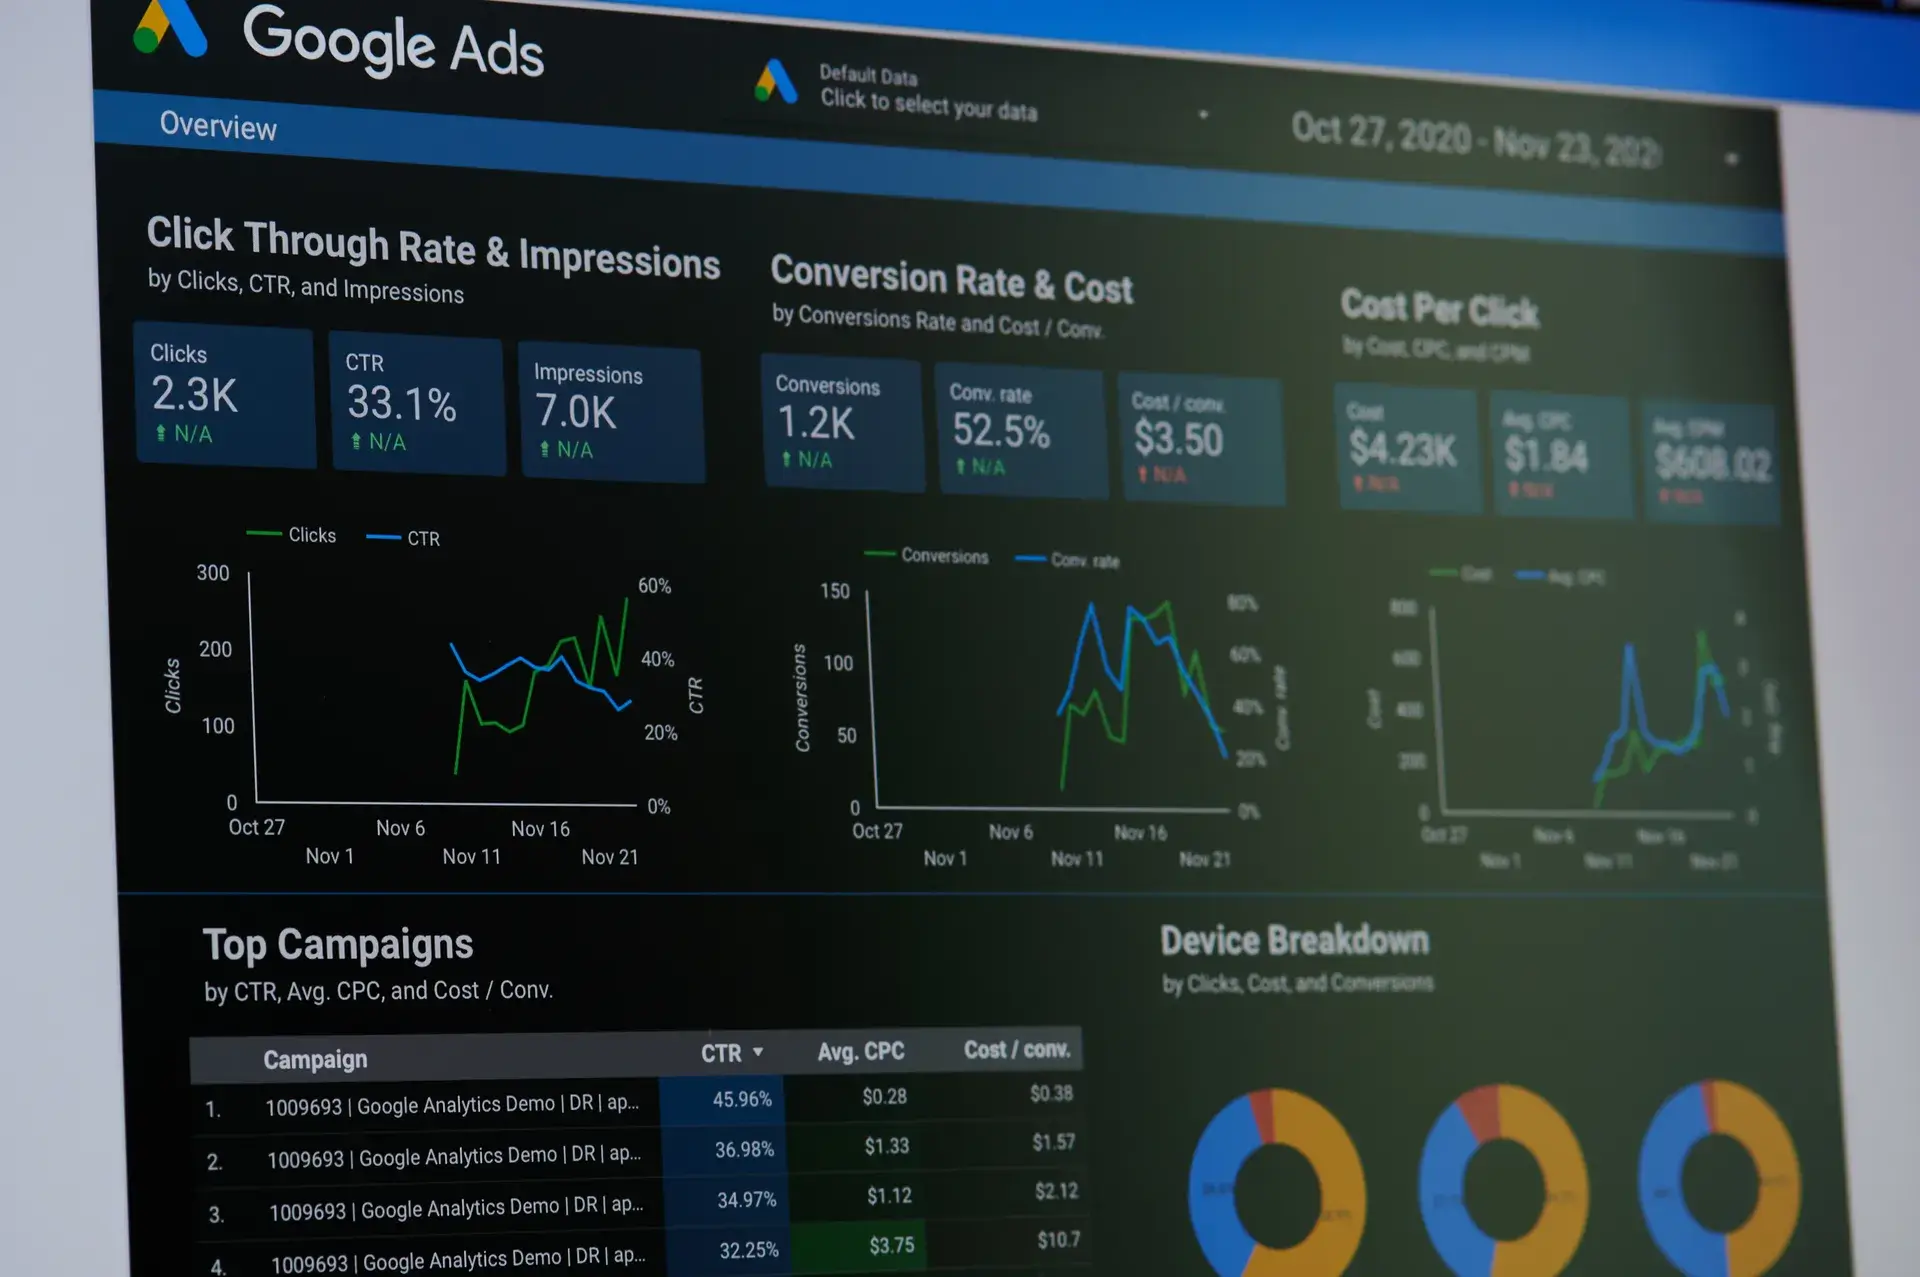
- Track KPIs: Regularly review key performance indicators such as CTR (click-through rate) and conversion rate.
- Make adjustments: Based on your performance data, tweak your ad copy, targeting, or budget to improve results.
Conclusion
Adding Google Ads to your website is a powerful way to enhance your online marketing strategy. By following these steps, you can effectively integrate ads into your site and start driving valuable traffic. If you're looking for expert assistance with your digital marketing, consider partnering with Prebo Digital, where we provide tailored solutions to elevate your online presence.